Configuration
Now that you've installed WooCommerce for LatePoint, the next step is to configure it and begin accepting payments for your bookings via WooCommerce checkout.
Heads Up!
In order to enjoy the full range of WooCommerce for LatePoint features offered by the license you've purchased, ensure that you register your purchase code, preferably before beginning the configuration process. You may register your purchase code by navigating to TechXela > Licenses from your LatePoint dashboard.
Settings
Navigate to Settings > Payments from your LatePoint dashboard, then scroll to the WooCommerce section:
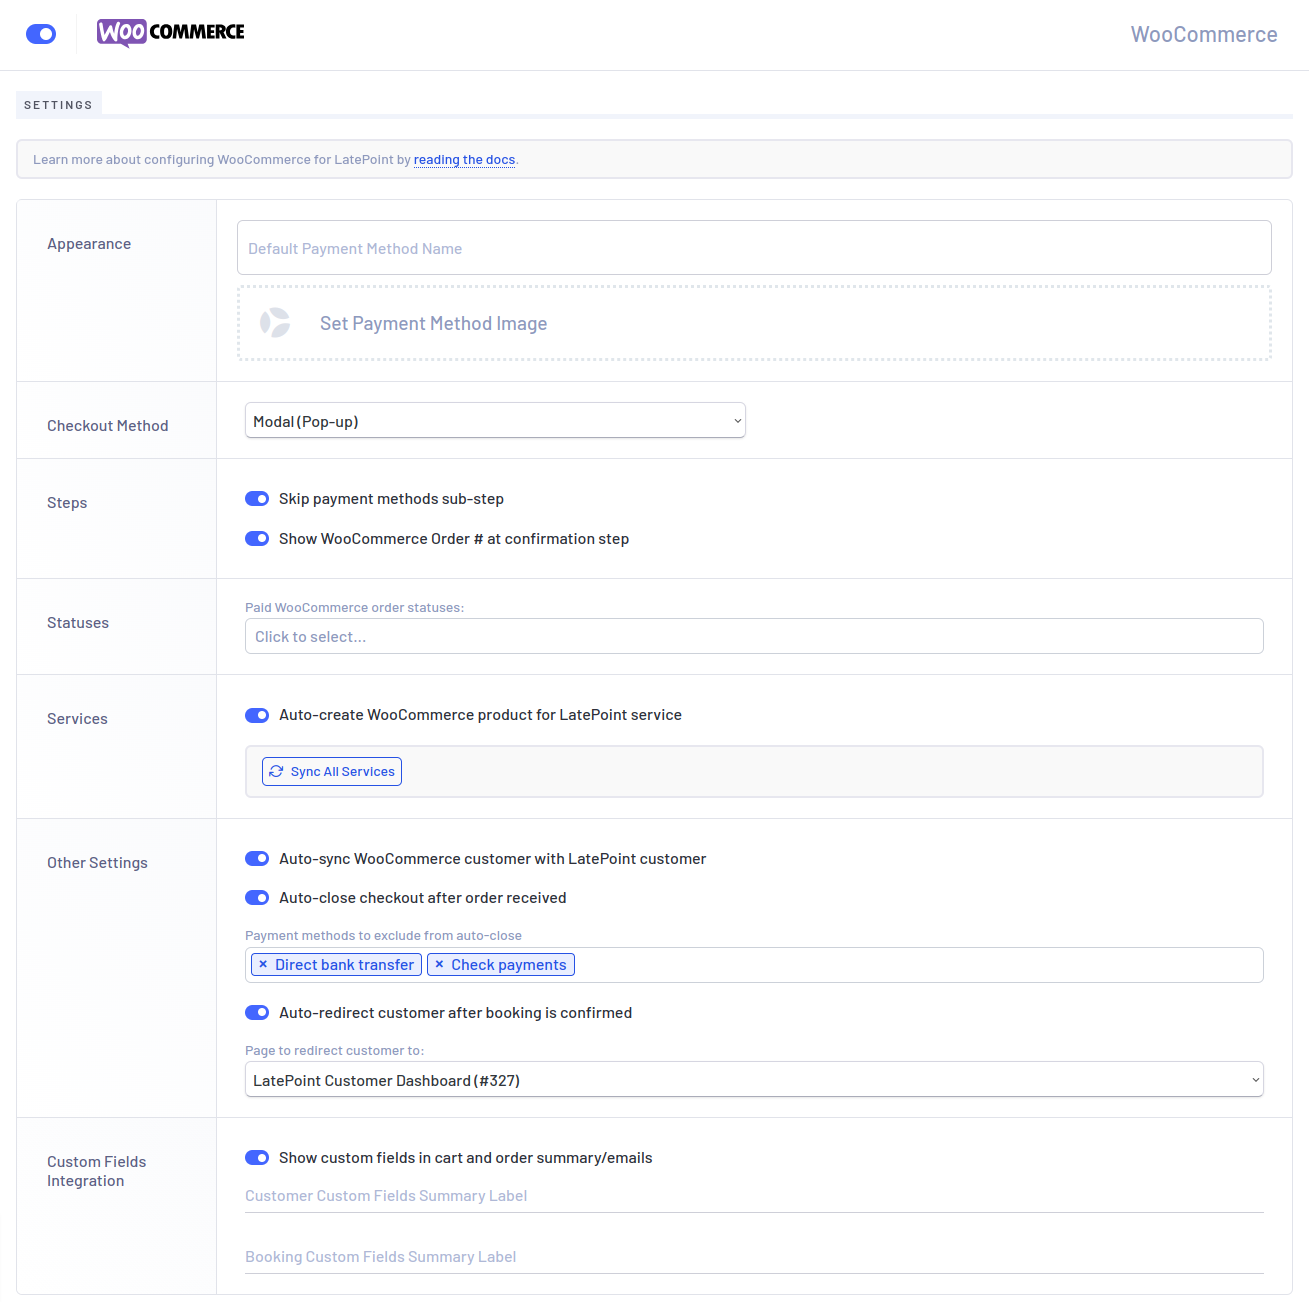
Appearance
- Default Payment Method Name: The name that is displayed across LatePoint's frontend and admin interfaces, replacing the
default payment processor name:
WooCommerce. - Payment Method Image: The default image to display on the booking form, for WooCommerce payment methods that have no default icon set.
Checkout Method
The method by which customers are presented with the WooCommerce checkout page. Available options are:
Modal (Pop-up): WooCommerce checkout is displayed as a modal/pop-up. Customers are then able to fill in their billing information and complete payment without ever leaving the LatePoint booking form.Redirect: Customers are redirected to the WooCommerce checkout page to complete payment, after which they are automatically redirected back to the LatePoint booking form at the appointment confirmation step.
Steps
- Skip payment methods sub-step: Enable this option to hide the WooCommerce payment methods sub-step, and allow customers to choose at checkout instead.
- Show WooCommerce Order # at confirmation step: Enable this option to display the
Order #link at the appointment confirmation step of the LatePoint booking form.
Statuses
- Paid WooCommerce order statuses: Select the additional WooCommerce order statuses which should result in successful customer bookings.
Other Settings
- Auto-create WooCommerce product for LatePoint service: Enable this option to automatically create a matching WooCommerce product (complete with name, image and description) whenever a LatePoint service is created.
Sync All Services: Click to auto-create/associate matching WooCommerce products for all active LatePoint services. If a WooCommerce product is already associated, it is updated instead.
- Auto-sync WooCommerce customer with LatePoint customer: Enable this option to automatically assign the WooCommerce customer to the LatePoint customer after a successful booking.
- Auto-close checkout after order received: Enable this option to automatically close WooCommerce checkout and return
to the booking form once the customer's payment is successful. Otherwise, the customer remains on the Thank You/Order Received
page.
Note: This option and its functionality are overridden by the Auto-redirect customer after booking is confirmed option below.
Payment methods to exclude from auto-close: Select from the list of WooCommerce payment methods that should not be auto-closed unless their orders are in a paid status.
- Auto-redirect customer after booking is confirmed: Enable this option to redirect the customer to a custom page after
they have paid/confirmed their booking.
Page to redirect customer to: Select from the list of site pages that the customer should be redirected to.
- Show custom fields in cart and order summary/emails: Enable this option to display Customer/Booking Custom Fields
in the WooCommerce cart/order/email summaries. Requires the Custom Fields Addon
Customer Custom Fields Summary Label: Specify the label under which to display Customer Custom Fields (default: Custom Fields (Customer))Booking Custom Fields Summary Label: Specify the label under which to display Booking Custom Fields (default: Custom Fields (Appointment))
info
Once you enable the WooCommerce payment processor, a WooCommerce product will be created automatically, and can be found in the Products list in your WordPress admin panel, below WooCommerce. This product provides the necessary connection between WooCommerce and LatePoint. However, it will not be visible to your customers when browsing or searching your shop. The default product name is Appointment, but you can change it by going to the Products page, clicking on the product, and changing its name.
warning
While the WooCommerce payment processor is enabled, other payment processors (excluding Local Payments) are disabled since WooCommerce support the same payment methods.
Status Rules
Status Rules allow you to define WooCommerce order statuses that will represent particular LatePoint booking and transaction funds statuses. When a WooCommerce order changes status, WooCommerce for LatePoint will automatically update the corresponding LatePoint transaction funds status.
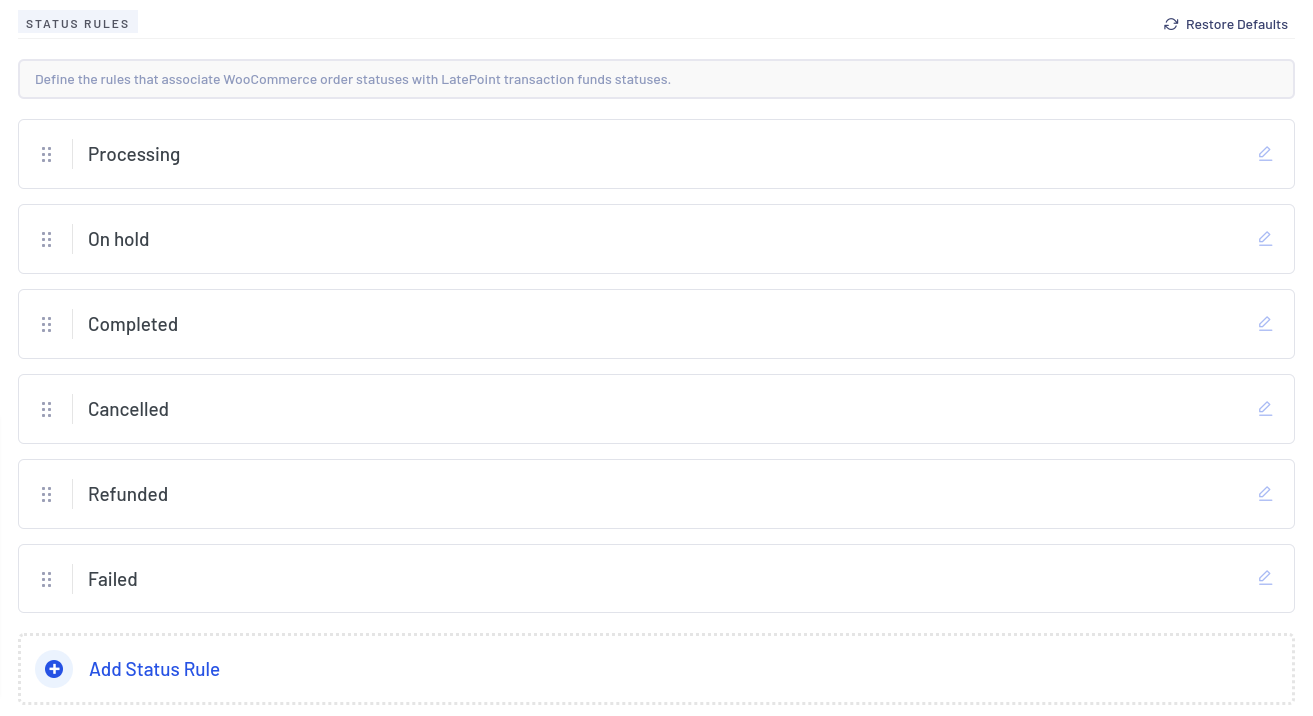
Status Rules for the default WooCommerce order statuses are included after installation. However, you have full control over the management of Status Rules to align with your business logic. If needed, you can restore the default Status Rules at any time. The available options on a Status Rule are:
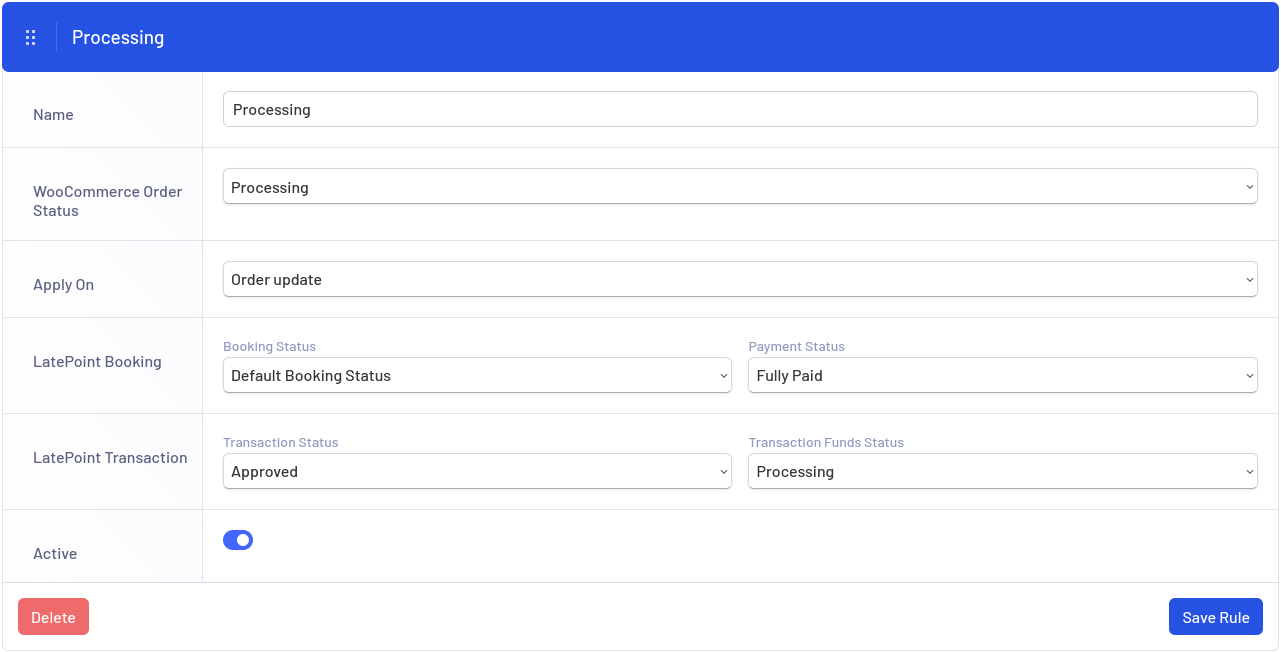
- Name: A descriptive name for the Rule.
- WooCommerce Order Status: The WooCommerce order status which triggers the Rule.
- Apply On: When to apply the Rule. Either on Order creation or Order update.
- LatePoint Booking:
- Booking Status: The LatePoint booking status to apply when the Rule is triggered.
- Payment Status: The LatePoint booking payment status to apply when the Rule is triggered.
- LatePoint Transaction:
- Transaction Status: The LatePoint transaction status to apply when the Rule is triggered.
- Transaction Funds Status: The LatePoint transaction funds status to apply when the Rule is triggered.
- Active: Determines if the rule is enabled and can be triggered. Unchecking this option is the less destructive alternative to deleting the Rule.
Service Products
By default, all LatePoint services are connected to the default WooCommerce Appointment product. However, WooCommerce for LatePoint allows you to assign a distinct WooCommerce product to each LatePoint service. This allows you to use the full power of WooCommerce to drive your LatePoint service bookings. Common scenarios are:
- Custom taxes to be applied on a per-service level.
- Enroll customers into a membership or course after they book a particular service.
- Send invoices to customers after they book services, to comply with local laws.
From your LatePoint dashboard, navigate to Services > All Services. Open one of the services and scroll down to the WooCommerce Settings section:
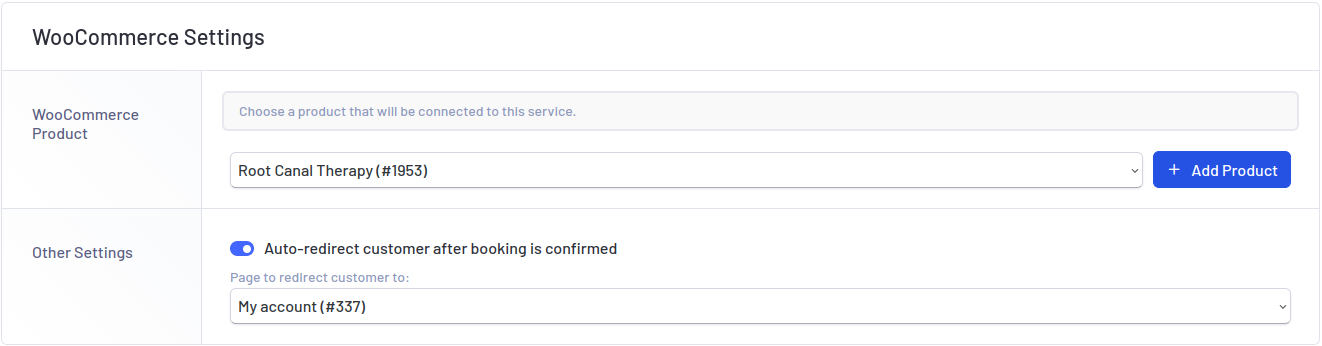
- WooCommerce Product: Using the dropdown, choose a WooCommerce product that will be connected to that particular service. You may quickly create a new product by clicking the + Add Product button. You will be redirected to the WooCommerce Add new product page, where the LatePoint service name and description will be pre-filled for your convenience.
You may then save the product by clicking the Publish button, and return to the LatePoint service by clicking the Return to LatePoint Service button (located above the product's title text field). The newly published product will now show up in the service's WooCommerce Product dropdown.
Heads Up!
Before you Publish/Save the new product, we highly recommend that you set the product's Catalog visibility to Hidden, from the Publish meta box (located next to the product's description text area). This prevents the product from showing up in your shop and confusing customers. However, this recommendation may be disregarded if you absolutely know what you're doing.
- Auto-redirect customer after booking is confirmed: Enable this option to redirect the customer to a custom page after
they have paid/confirmed their booking (only when that service has been booked).
Page to redirect customer to: Select from the list of site pages that the customer should be redirected to.